
How to Hang a Picture So It Doesn't End Up on the Floor: A Guide to Wall Hooks
So, that Striped Circle tube has landed. Inside is a lyrical masterpiece from The Smiths or a design celebrating your club's treble-winning season. But for now, it's just propped against a chair, silently judging your commitment. Getting it up on the wall can feel like the final, nerve-wracking penalty in a shootout.
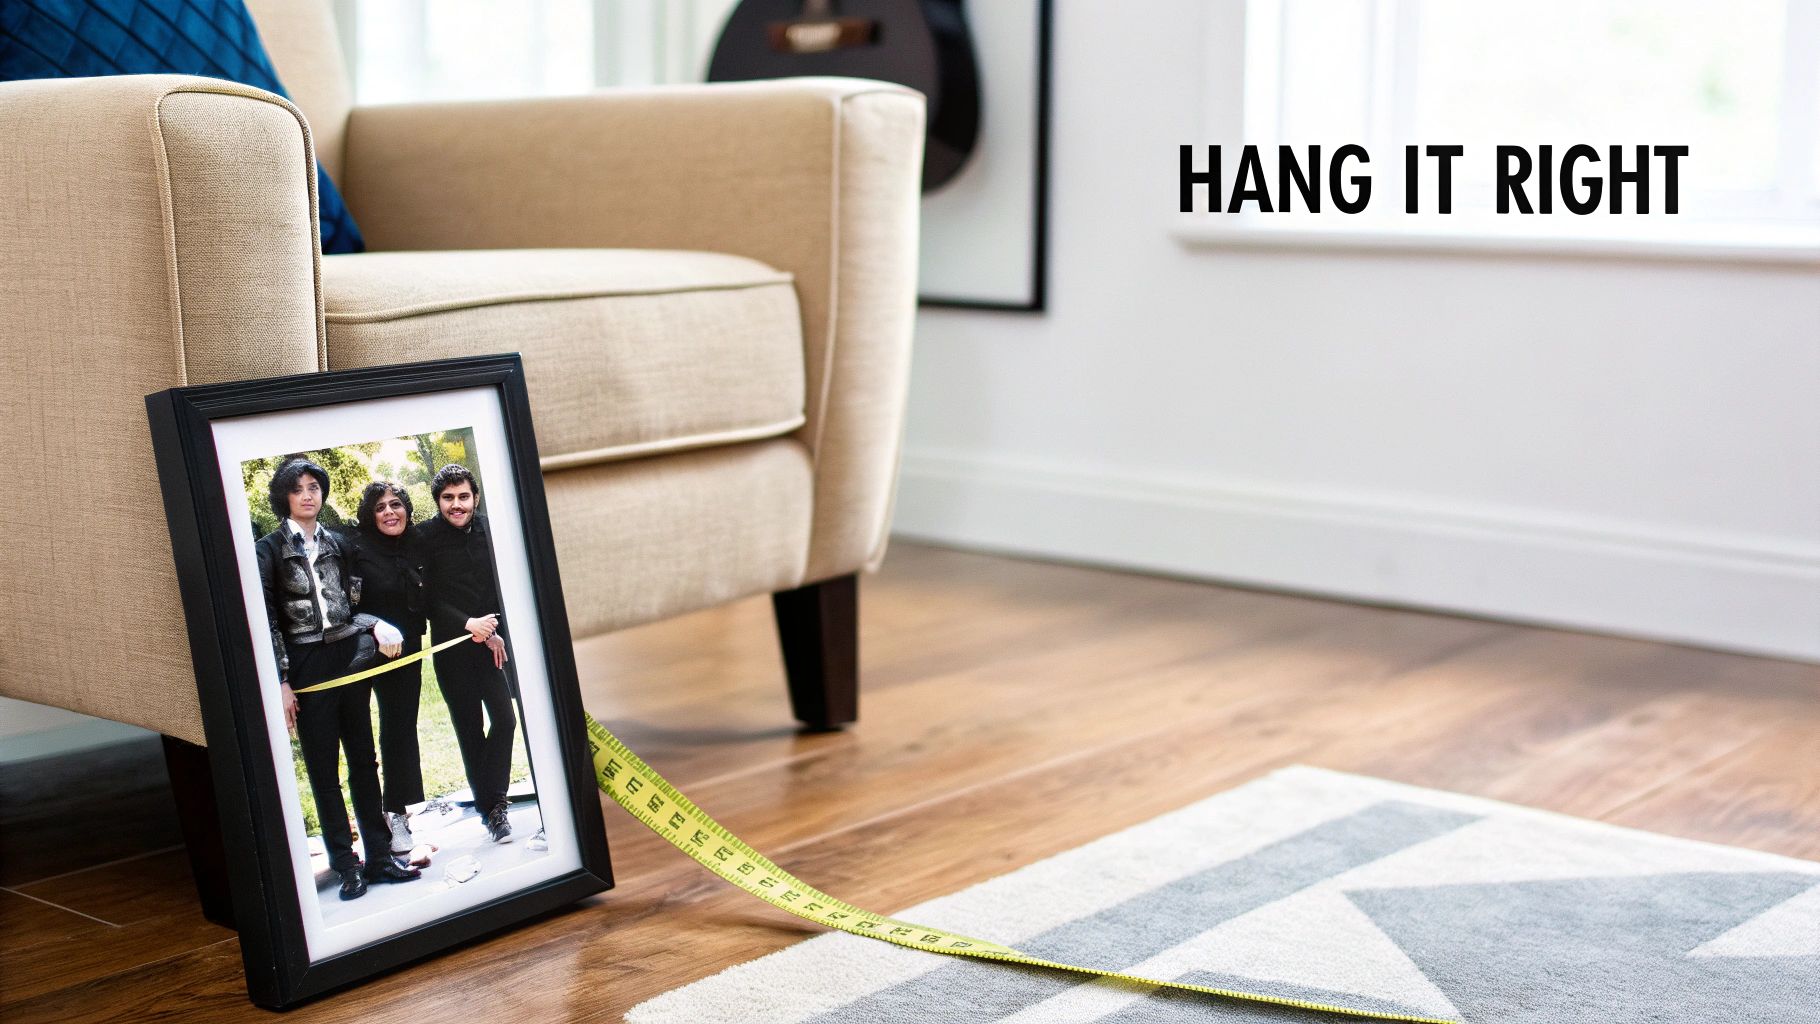
This isn’t about just whacking a random nail in the wall and hoping for the best, like a Sunday League tackle. It's about choosing the right picture wall hooks to give your new print the Old Trafford-sized stage it truly deserves. We'll demystify the options and cut through the noise of the hardware aisle.
The Great Wall Debate
Before you even think about hanging anything, you need a game plan. You've already invested time and care into choosing your print, and you might even be looking into how to frame posters for that pro finish. The last thing you want is for it to end up on the floor because you used a hook with the structural integrity of a chocolate teapot.
Think of this guide as your pre-match briefing to ensure your walls stay pristine and your art stays put. We’ll cover everything from simple hooks for lightweight posters to robust fixings for that hefty framed tribute to your team's legendary line-up.
The good news is, you're not alone on this DIY quest. Picture wall hooks have become a cornerstone of UK home decoration, especially with the recent surge in home projects.
It's predicted that by 2025, adhesive hook hangers will dominate with a 42% market share in Europe. They're prized for supporting up to 10kg without nails, making them ideal for gallery walls of alternative music posters or Premier League tributes. You can discover more insights about picture hanging system trends on Intel Market Research.
So, let's get that art out of its tube and onto the wall where it belongs. This is the ultimate preparation for giving your unique prints the home they deserve, making your space a proper reflection of your passions—whether that's Oasis or Man City.
No more leaning art, no more Blu-Tack stains. Just perfectly hung prints that make you smile every time you walk past.
Getting to Grips with Your Walls
Before you even dream of picking a hook, you need to figure out what you’re working with. Sticking the wrong fixing into the wrong wall is a surefire way to have your favourite print take a nosedive, and nobody wants to see Liam Gallagher face-plant the carpet. Most UK homes have one of three main wall types, so let's get acquainted.
The most common one you'll find, especially in newer builds, is plasterboard (often called drywall). It's essentially a plaster core sandwiched between two sheets of paper. Give the wall a gentle knock – if it sounds hollow, you've likely found plasterboard.
It’s a doddle to work with, but its biggest drawback is its lack of real strength. You might get away with a simple nail for a postcard, but for anything with a bit of weight and a frame, a standard nail just won't cut it. It needs more support than a struggling manager.
Identifying the Main Wall Types
Matching the right fixing to your wall is crucial. Think of it as choosing the right player for the position. Get it right, and your pictures will be safe and secure for years.
-
Plasterboard/Drywall: The modern standard. A simple picture hook is fine for very light items. For that treasured framed print, though, you’ll want to use a dedicated plasterboard fixing. These are often chunky, self-drilling anchors that grip the board from behind, giving you a much more reliable hold.
-
Lath and Plaster: The old-school classic, found in houses that have seen more history than your local pub. It’s a wall made of thin wooden strips (the lath) covered with a thick layer of plaster. It can be surprisingly tough but also brittle. One spot might feel solid, while another just a few inches away crumbles like a defence under pressure.
-
Brick or Concrete Block: The heavyweight champion. This is your solid, dependable wall, usually an external one or a party wall between terraced houses. Knock on this, and you’ll get a dull, solid thud. There's no messing about here; this wall demands serious hardware, the Vinnie Jones of fixings.
How to Handle Trickier Walls
When you're faced with lath and plaster, the name of the game is patience. The vibration from drilling can easily cause the old plaster to crack and splinter. A simple trick is to put a bit of masking tape over the spot you want to drill; this helps hold the surface together and gives you a cleaner hole. If it does crumble a bit, don't worry. A metal self-drilling anchor can often power through where a plastic one would just spin uselessly.
For brick and concrete, you need to bring out the big guns. Your standard cordless drill probably won't be up to the task. You'll need a hammer drill and a proper masonry bit. The process is straightforward: drill a hole, pop in a plastic wall plug (like a Rawlplug), then drive a screw into the plug. As the screw goes in, the plug expands and locks itself into the brick, creating an incredibly strong fixing point for even the heaviest pieces.
Choosing the Right Hook for Your Masterpiece
Right, let’s get down to business. Choosing the perfect hardware for your Striped Circle print is the crucial last step, and getting it right means your new artwork stays exactly where you want it. This isn’t about guesswork; it's about matching the right hook to your wall and the weight of your frame.
Lighter Prints and Posters
For your lightweight lyric prints or that iconic band poster, you’ve got a couple of fantastic, low-hassle options that won't give you a headache.
The classic picture hook – a small metal hook with a sharp pin – has been a go-to for generations for a reason. It’s absolutely perfect for plasterboard walls and leaves a hole so minuscule you’ll barely spot it if you ever decide to move things around.
Then there’s the renter's best friend: the adhesive strip. Forget the flimsy tabs of the past; modern versions are incredibly strong. The secret to success? Start with a clean, dry surface and press firmly for at least 30 seconds. Skip this step, and you’re tempting fate and risking that heart-stopping crash in the middle of the night.
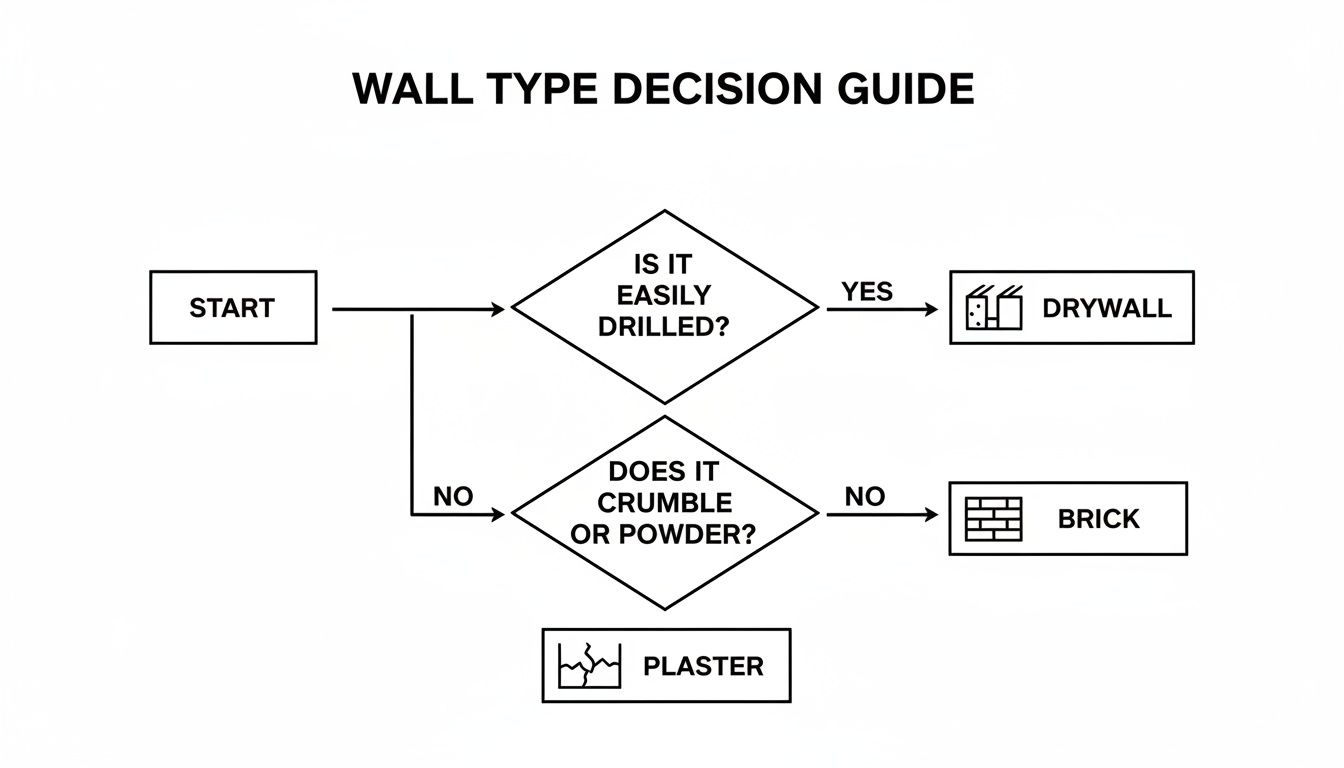
What Are Your Walls Made Of?
Not sure if you're dealing with plasterboard, brick, or something else? This quick flowchart will help you figure it out. How the wall behaves when you try to drill into it tells you everything you need to know.
This isn’t just a minor detail, either. The UK wall hangers market is now worth a staggering £1.2 billion. It’s no surprise that adhesive hooks are leading the pack, with 52% of people choosing them for home use. With 68% of UK renters keen to avoid drilling, they're the obvious choice for everything from a 1 kg lyric print to a heavier 20 kg framed piece.
Heavier Frames and Statement Pieces
Now, for your bigger, weightier artwork – like a panoramic stadium print or a properly framed piece celebrating your club’s history – it's time to step things up. This is where wall plugs and screws become essential.
It might sound a bit more involved, but it’s actually very straightforward. A good quality wall plug gives the screw the solid grip it needs to securely hold a heavier frame for years to come.
And don’t forget, the size of your frame plays a big part in this. If you’re a bit stuck, our guide on what size poster frame you need can clear things up.
The real secret is matching the wall plug to the wall type. A standard plastic plug is your best bet for solid brick and concrete. For plasterboard, you'll want a specialised fixing that opens up behind the board like an anchor. Get this right, and your art isn't going anywhere.
The Ultimate Hook and Wall Match-Up Guide
To make it even simpler, I've put together this quick-glance table. Think of it as your cheat sheet for pairing the right fixing with the right wall, so you can hang your prints with total confidence.
| Wall Type | Best Hook or Fixing | Ideal for These Prints | Expert Tip |
|---|---|---|---|
| Plasterboard (Drywall) | Adhesive Strips or Picture Hooks | Lightweight prints (up to 7kg) | For anything heavier, use a self-drilling plasterboard fixing. It provides a much stronger anchor. |
| Plaster & Lath | Hardened Picture Nails or Wall Plugs | Small to medium prints (up to 15kg) | Pre-drill a pilot hole to prevent the plaster from cracking. It's a classic wall type in older UK homes. |
| Brick or Concrete Block | Wall Plug & Screw | All sizes, especially heavy frames (20kg+) | You'll need a masonry drill bit. Match the wall plug size to the drill bit for a snug, secure fit. |
| Wood or Studs | Simple Screw or Nail | Any print weight | If hanging on plasterboard, use a stud finder to locate the wooden beams for the most secure fixing point. |
Using the right combination is the difference between a perfectly hung gallery wall and a potential disaster. A few minutes of prep saves a lot of hassle down the line
A Practical Guide to Hanging Art Like a Pro
Right, you’ve scouted the wall, you’ve picked your hook – now for the main event. This is where the magic happens, turning that lonely print into a proper centrepiece. Forget the baffling diagrams; we're getting straight to what actually works.
First up, the prep. The old saying ‘measure twice, hang once’ is a cliché for a reason. It’s the difference between a perfectly placed piece and a wall that looks like Swiss cheese. A simple trick I swear by is using painter's tape to mark out the exact dimensions of your frame on the wall. This lets you step back, have a proper look, and really feel out the placement before you commit to making a hole.
Nailing the Placement and Prep
You don’t need a fancy laser level. Honestly, a simple spirit level, a pencil, and a tape measure are your best friends here. The classic interior design rule is to hang art so its centre is at eye level, which is generally about 57-60 inches from the floor.
But let's be realistic, rules are made to be bent. If your print is going above a sofa, for instance, make sure there’s enough clearance so nobody headbutts the frame when they stand up. A good 6-8 inches of breathing room usually does the trick.
Once you’re happy with the spot, you need to mark where the hook or screw will go. If your frame has a wire, pull it taut towards the top of the frame to mimic how it will hang. Now, measure the distance from that high point to the top edge of the frame. You'll then transfer that measurement onto your wall, marking down from the top edge of your painter's tape outline. Easy.
Getting the height right is half the battle. You want the art to feel like a natural part of the room, not a random afterthought. Take a moment to consider sightlines from where you usually sit – does that Oasis print look just as good from the sofa as it does when you walk in?
Drilling and Fixing Like You Know What You're Doing
Now for the fun bit. The tools you’ll need are pretty basic: a decent drill and the right drill bits for your wall type.
For plasterboard, a standard drill bit is all you need. You want to create a pilot hole that’s just a tiny bit smaller than your wall plug. This ensures a really snug, secure fit once you pop it in.
If you’re taking on brick or concrete, you'll need a proper masonry bit and a drill with a hammer setting. This combination does the hard work for you, powering through tough surfaces. The key is to keep the drill straight and steady – don't force it.
With your hole drilled, gently tap the wall plug in with a hammer until it’s perfectly flush with the wall. Now you can drive your screw in, leaving it sticking out just enough to securely hold your frame's wire or hanger. For particularly large or heavy pieces, the principles are the same, but you’ll want to be extra certain about your fixings. You can find more detailed advice in guides on how to hang heavy items like a mirror safely, as the techniques overlap.
And that's it. Stand back and admire your handiwork. You've just given your print the prime spot it deserves, without a single frantic phone call for a rescue mission. Go on, give yourself a high-five – you've earned it.
Curating Your Own Hall of Fame Gallery Wall
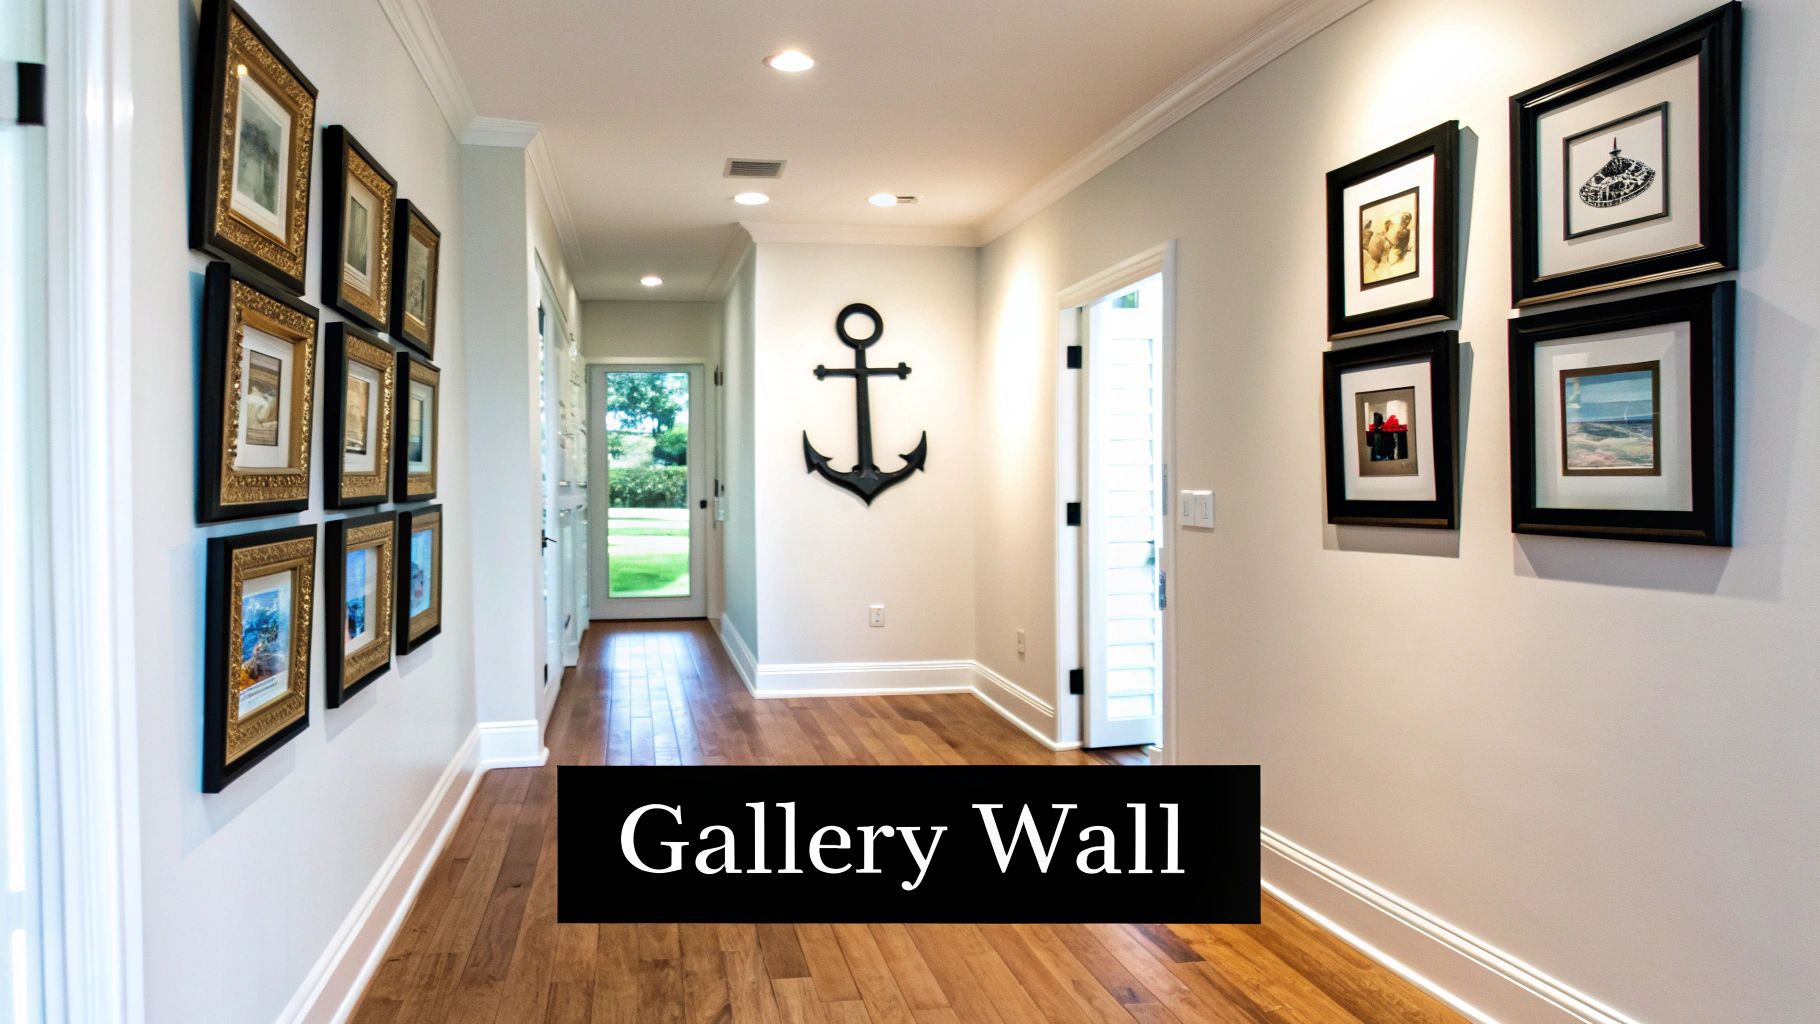
One print looks great, but a whole collection makes a real statement. This is your chance to build a personal hall of fame—a visual playlist of your favourite tunes and sporting triumphs, all brought to life by the humble picture wall hooks you've just mastered.
A great gallery wall needs a game plan, just like a cup final. You wouldn't send the team out without a formation, would you? The same logic applies to your prints.
Laying Out Your Master Plan
When it comes to arranging your art, you generally have two main strategies. You can go for a structured, grid-like layout which works brilliantly if you have a set of same-sized prints. It creates a clean, organised look, much like a well-drilled defence.
Alternatively, you could embrace the organised chaos of a salon-style hang. This involves mixing different sizes and frames for a more organic, dynamic feel that grows over time.
Whichever approach you choose, the secret is balance. And here’s a pro tip that will save both your sanity and your walls: lay everything out on the floor first.
Arrange your prints, move them around, swap that Morrissey one with the Anfield piece, and then live with the layout for a day. Trust me, this simple dress rehearsal prevents your wall from looking like it’s been used for penalty practice.
Nailing the Finer Details
Once you've settled on a layout you love, think about spacing. Keeping a consistent gap between frames—say, two to three inches—is the key to making the collection look cohesive rather than just thrown together.
A great way to start is with an 'anchor piece', which is usually your largest or most eye-catching print. Hang it first, perhaps slightly off-centre, and then build the rest of your collection out from there.
Since 2020, gallery wall installations in the UK have shot up by 41%. Themed art, like Oasis lyrics or Liverpool FC tributes, is a massive driver of this trend. We're also seeing football fans hang 2.3 times more items per wall, while improved adhesives have thankfully seen hook failure rates drop to a tiny 1.5%.
Now that you’ve mastered hanging your own prints, you might be looking for more inspiration. Have a look at these creative ways to display photos and refresh your home.
Ultimately, your gallery wall is a reflection of you. It's the place where your love for The Stone Roses can live right alongside your passion for the beautiful game, turning a blank space into a fantastic conversation starter.
Got a Few Lingering Questions?
Alright, you're nearly there. The wall is prepped, the tools are out, and you're ready to get that print up. But even the most seasoned DIY-er has those last-minute head-scratchers. Let’s clear up a few of the most common ones before you make that final push.
How High Should I Actually Hang This Thing?
The age-old advice is to hang artwork so the centre of the piece sits at eye level. For most people, that’s somewhere between 57 and 60 inches (about 145-152 cm) from the floor. This is a brilliant starting point because it places the art in a person's natural line of sight.
But let's be realistic—this isn't a gallery. In your own home, context is king.
- Above a sofa or console table? Give it some breathing room. A gap of 6-8 inches between the top of the furniture and the bottom of the frame usually looks spot on. It connects the two pieces without feeling cramped.
- Got soaring ceilings? You can definitely push the artwork a bit higher to balance the vertical space.
- Hanging in a hallway? Sticking to the eye-level rule works perfectly here, creating a comfortable viewing experience as people walk past.
The best trick in the book? Grab a mate. Have them hold the frame against the wall while you step back and take a look. If it feels right, it probably is.
Can I Get Away With Using Those Sticky Adhesive Hooks?
We've all seen them, and the promise of a no-drill, no-mess solution is tempting. For smaller, lighter pieces—like unframed prints or very lightweight frames—they can be a great option.
However, approach them with a healthy dose of caution, especially for anything with a bit of heft. That beautiful glass-fronted frame holding your favourite print weighs more than you think.
Expert Tip: The biggest mistake I see is people guessing the weight of their frame. A simple A3 frame with glass can easily exceed the limits of a standard adhesive hook. Always check the weight rating on the hook's packaging, and if your print is anywhere near the maximum, it's safer to upgrade to a proper wall fixing.
Trust me, the convenience of a sticky hook isn't worth the sickening crunch of a fallen frame.
How Long Do I Need to Wait After Painting a Wall?
Patience is a virtue here. We know the excitement of wanting to get your new print up on that freshly painted wall, but you need to let the paint properly cure. Just because it feels dry to the touch doesn't mean it's ready.
Paint curing is a chemical process where it hardens all the way through, and this can take anywhere from a few days to a few weeks, depending on the paint and the conditions in the room.
If you hang something too soon, especially with an adhesive hook, you risk pulling a chunk of that new paint right off the wall when you eventually move it. If you're absolutely desperate, a very small, thin nail or pin-style hook will do the least damage. But the best advice is to wait at least a week. It’s worth it to protect your handiwork.
Ready to create your own wall of fame? At Striped Circle, we have a huge collection of unique music and football prints that are just waiting to take centre stage in your home. Find your next masterpiece.
